YOUR WAY TO THE doo EVENT
Basics
Welcome to the training page. Below you will find an overview of all functions and how to use the system.
The most important steps:
- How do I log into the system?
- What does the term "dashboard" mean?
- What do I see when I click on "Events"?
- Which event templates are stored and what is the difference?
- How do I create an event?
- What steps do I have to take I go through the event processing?
- How do I put my event live?
- What settings can I make regarding email content, booking conditions, cancellation & booking approval, languages, tickets & attachments and access codes?
- What is the booking overview and how does it work?
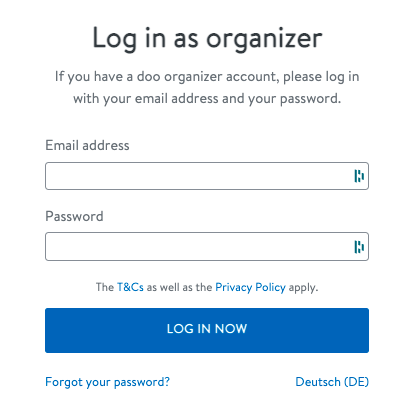
Login
Go to the "https://doo.net/konto/login" page.
Enter your login information consisting of your email address and password.
If you have been invited to an account, all you have to do is click on the link in your email and follow the instructions provided.
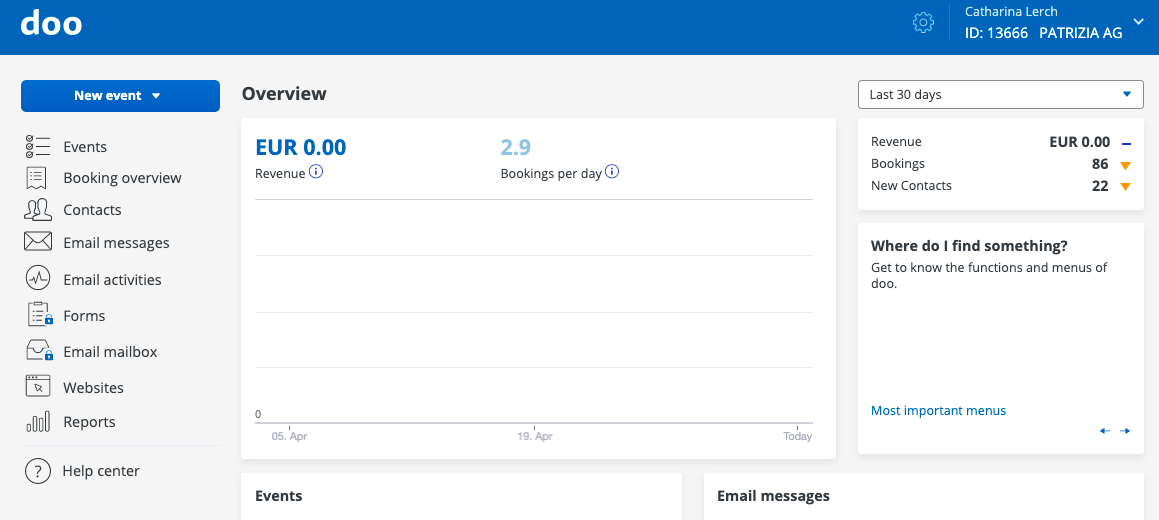
Dashboard
After logging in, you will be taken to your dashboard.
This enables you to navigate quickly and centrally through the tool and presents the most relevant data.
By clicking on the doo logo (top left) you can return to your dashboard at any time.
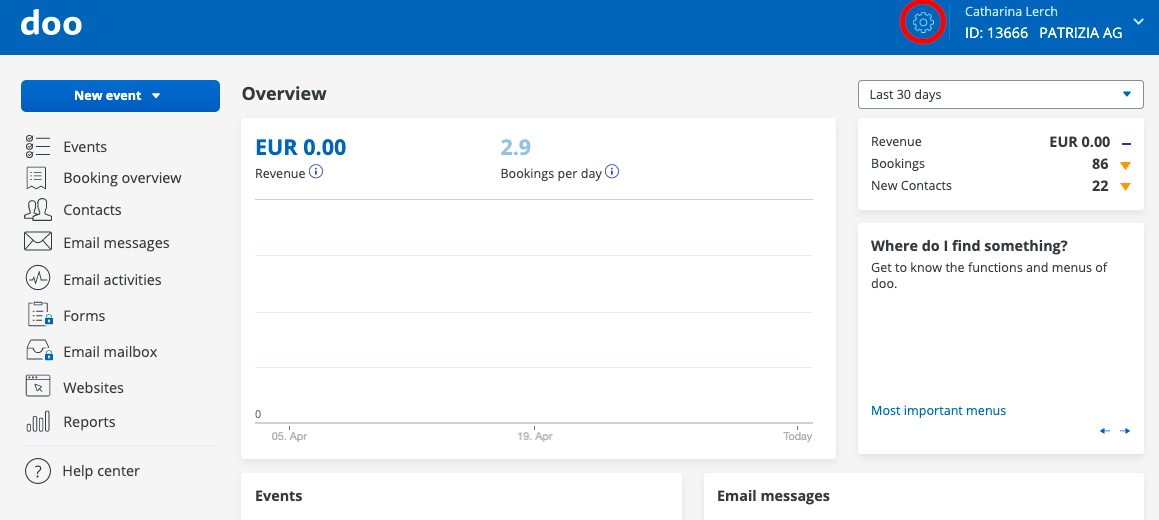
Organization Settings
You can access the organization settings from the dashboard. To do this, click on the cogwheel in the blue line in the upper right area.
In the organization settings you will find the settings in the areas
- AccountUserData (incl. contact fields)Events
These settings can only be changed by users with the Event Manager role or higher.
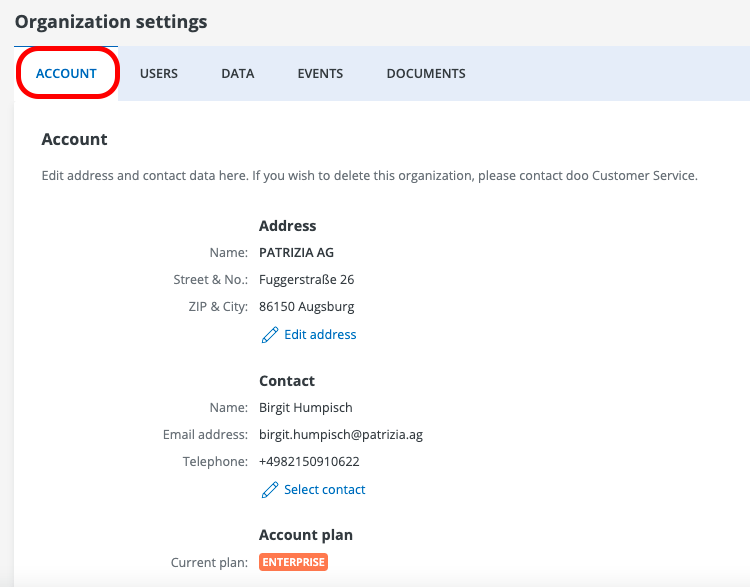
Account Settings
The account settings are already filled in. If the data differ, please adapt them yourself!
The organizational address is not related to the event address, ie the organizational address is only required for internal purposes. Therefore, please enter the event address independently for your events.
A contact person for internal matters must be defined for each organization account. If this changes, please adapt this yourself.
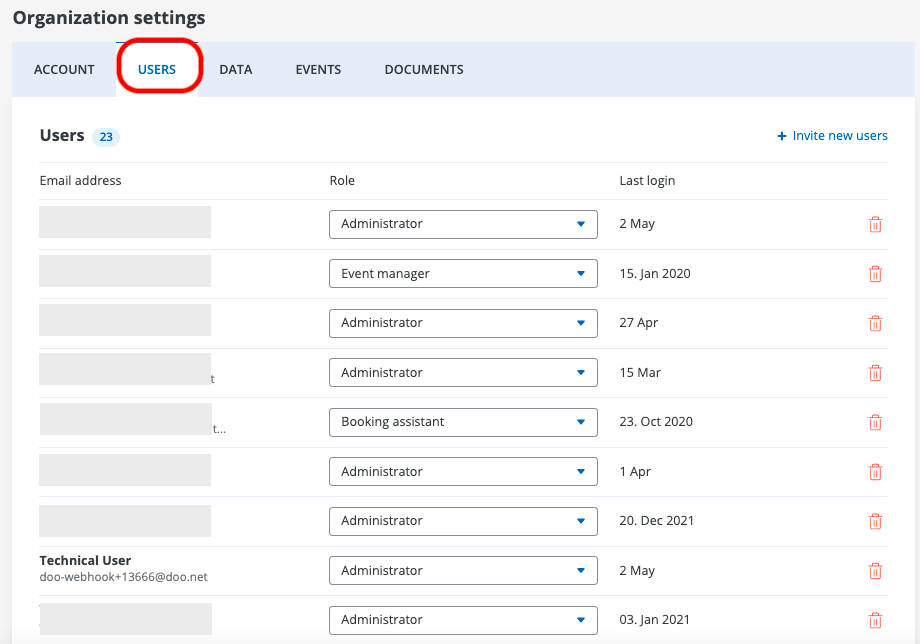
User
Via " Invite new users" you can add new users to the event processing.
In order to add a new user you have to enter the e-mail address in the appearing pop-up window
enter and assign the role.
To delete a user for event processing, use the red garbage can on the right
Rand.
User roles:
- Administrator: Can edit account information and manage users
- Event manager: Like administrator, but cannot see and manage users and user rights
- Booking assistant: Can manage attendees, contacts and bookings, but not see sales figures or download lists
- Read only: Can see and download attendees, contacts and bookings, but not make changes
Important! For various functions, users with the name "System Emails" or "Technical User" may exist. Please do not delete these users and the user "Birgit Humpisch" under any circumstances!
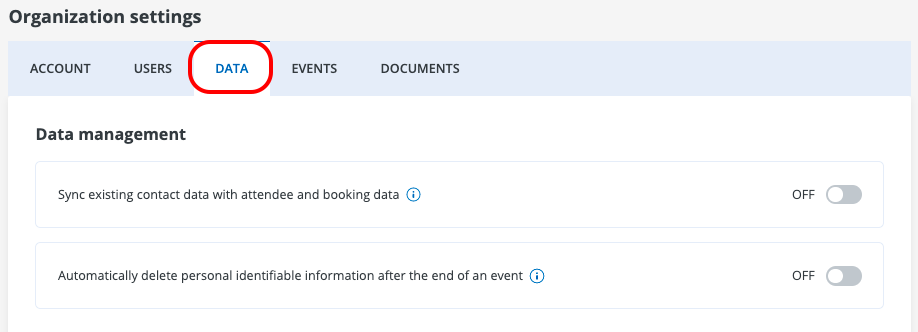
Data Management
The handling of sensitive data is regulated in data management. If you have already imported your own contact data, you can specify whether this data can be supplemented.
In addition, it is stipulated that personal data will not be deleted after the event.
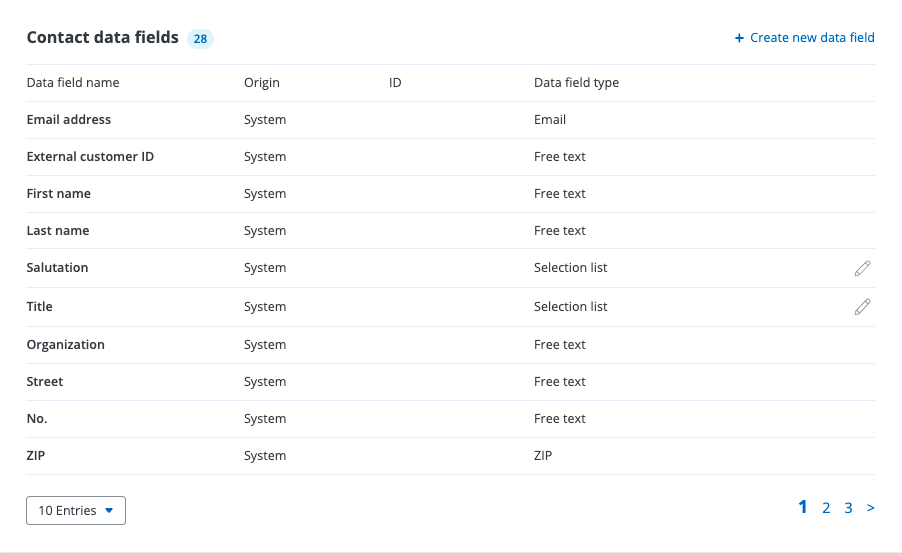
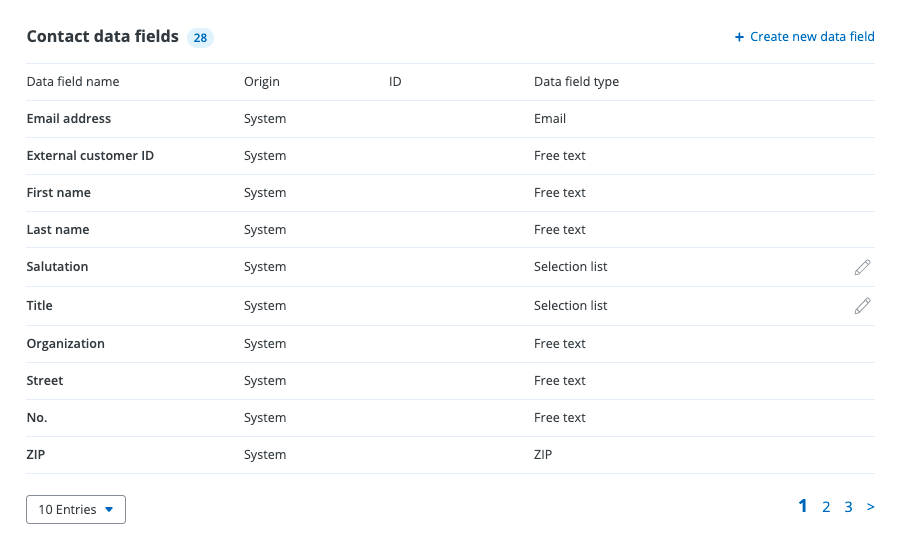
Contact Data Fields
Contact data fields are used to assign the collected answers to individual questions in the booking process to a contact across events.
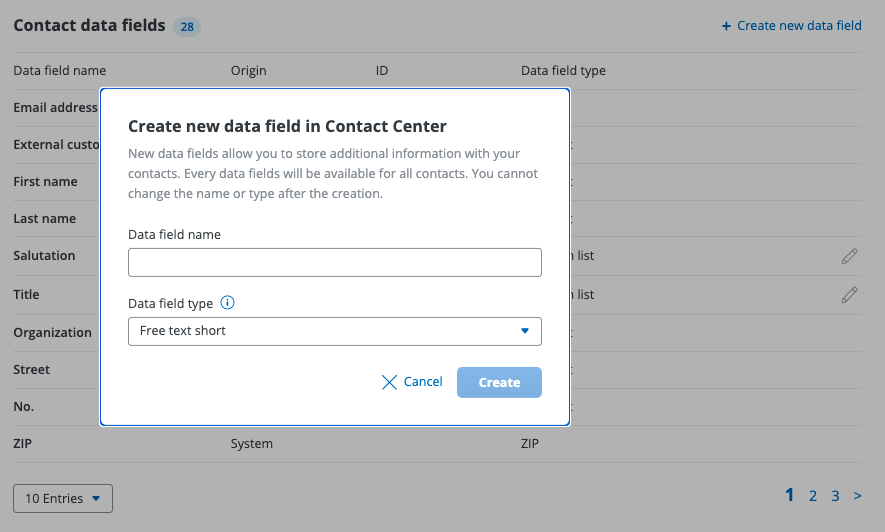
To create a new data field, click on " Create new data field". A pop-up then opens in which you must enter the name of the contact data field and then specify the data field type.
Data field types:
- Free text short: Offers space for approx. 130 characters
- Free text long: Offers space for more than 130 characters
- Selection list: Offers a selection option from an individual drop-down menu
- Checkbox: Returns the value true or false
- File: Saves a file and displays the link
- Telephone number: Especially suitable for telephone numbers
- Date : Specifies a date
Important! The designation of the data fields must be unique, so no designations can be assigned twice. Existing data fields cannot be edited.
Event Fields
You can create your own event fields via the Events tab. These created fields are displayed during event creation.
The event fields Salesforce Campaign (Internal) is stored by default.
Add a new query field via " New event field".
Specify a field name and the corresponding field type, you can choose from the following types:
- Free text = You can insert your own text (suitable for speakers or agenda)
- Selection list = You must choose a selection from your options (suitable for internally identifying the event formats)
- File = You must upload a file that will be displayed to you or the participants ( suitable for providing information to participants)
Optionally, you can choose whether the query field should be added to new events by default or whether this designates an internal field that is not visible to the participant.
Important! Please do not delete an event field!
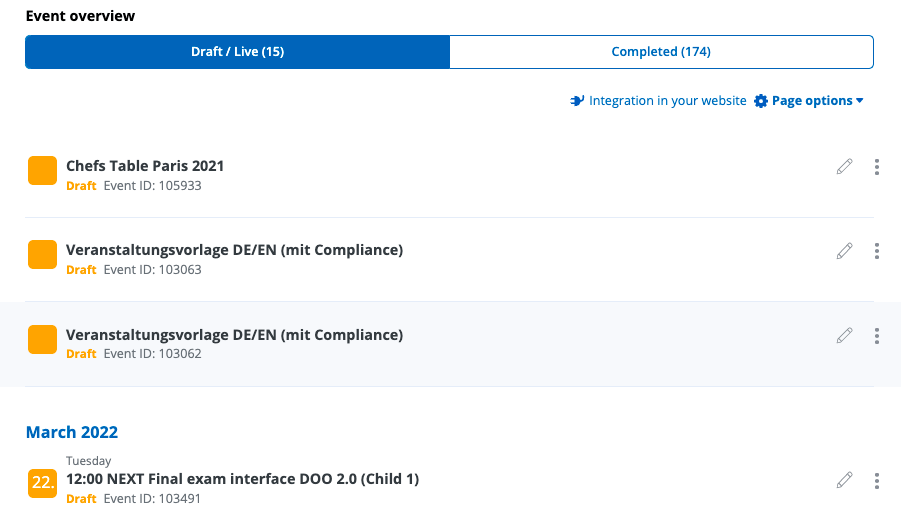
Event Overview
Here you will find all information regarding your event.
You create new events via Salesforce.
If you create an event, it will appear as a draft in your event overview.
Events can be in different phases. They can be in creation, live, or completed.
"Draft" means that the event is currently still in the draft stage. Events of this type are represented by orange icons.
"Live" means that the event can be booked by participants and can be accessed via the event website. Events of this type are marked with green symbols.
"Completed" events can be viewed in the tab menu above. In addition, they are greyed out.
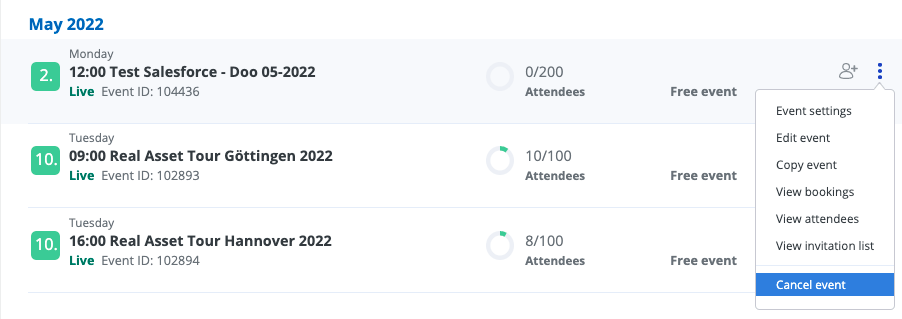
Cancel Event
Events can easily be cancelled. However, you must be in the "Live" phase to do this.
You have several options for canceling an event.
In the event overview, live events can be canceled via the three-point menu.
Alternatively, you can select the event with a click and cancel the event via the administration panel.

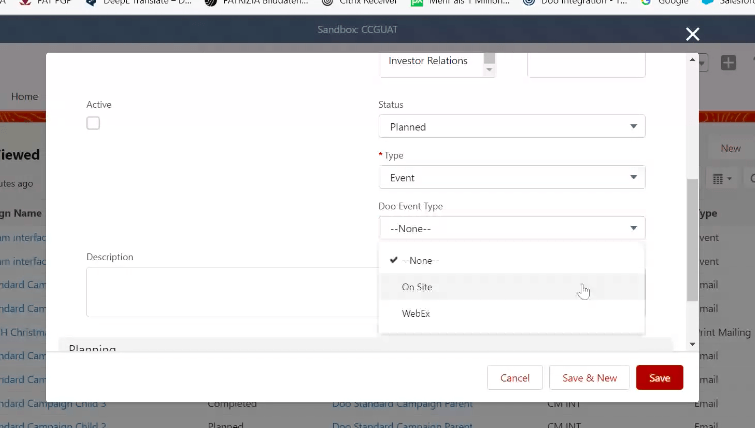
Templates -> still need to be updated
Two doo event types - On Site and WebEx - are stored in Salesforce and must be used to create events. These are linked to the templates for event creation in doo.
- On Site
Event Information
Event name = Salesforce campaign name
Cover image is stored and editable
organizer =
E-mail, contact person, telephone number (according to the account data)
event address =
Tickets
Event type = free, hidden
Total capacity = 20
Ticket name = registration
Ticket Count = 1, not editable
Without registration = end date of ticket category = immediately
participant data
Participant data is hidden
Book data prefilled
Email Content
Signature, subject and text pre-filled
Booking details and link to the booking portal pre-filled
Tickets & Attachment
Booker receives tickets = preselected
More settings
Booking Conditions
Manual release = hidden
Booker may cancel = activated
Check duplicates = enabled
Booker may edit booking = deactivated
- WebEx
Event Information
Event name = Salesforce campaign name
Cover image is stored and editable
organizer =
E-mail, contact person, telephone number (according to the account data)
event address =
Tickets
Event type = free, hidden
Total capacity = 20
Ticket name = registration
Ticket Count = 1, not editable
Without registration = end date of ticket category = immediately
participant data
Participant data is hidden
Book data prefilled
Email Content
Signature, subject and text pre-filled
Booking details and link to the booking portal pre-filled
Tickets & Attachment
Booker receives tickets = preselected
More settings
Booking conditions:
Manual release = hidden
Booker may cancel = activated
Check duplicates = enabled
Booker may edit booking = deactivated
Create an Event
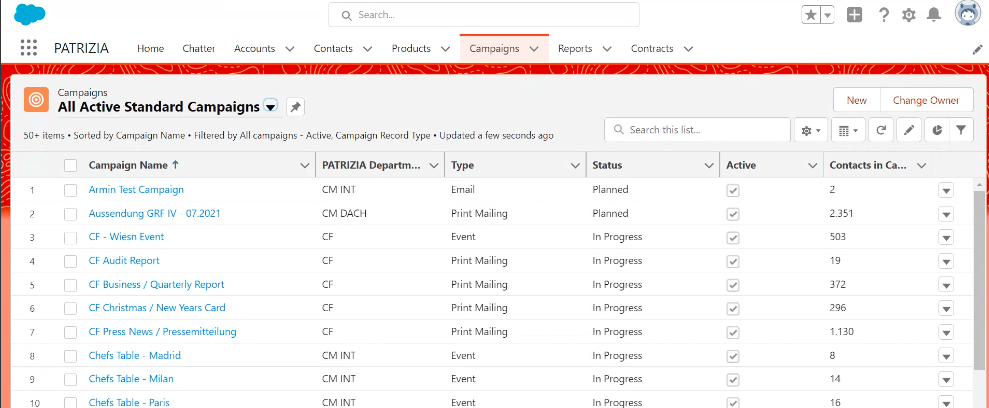
To create a new event, log in to Salesforce.
- Select your parent campaign under the "Campaigns" tab.
Create Child Campaigns
- Create a new child campaign using the "New Child Campaign" button.
- Select the contacts to add.
- Create the child campaign and assign it to the previously created parent campaign.
- Confirm the previously added contacts.
- Enter start- and end date of the child campaign.
- Set the status of the campaign to "Completed".
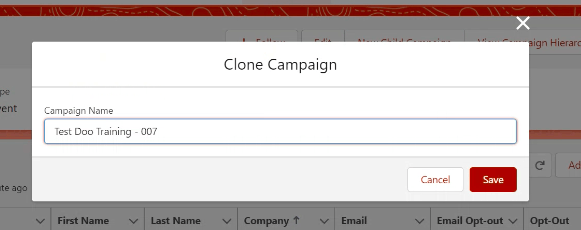
- Click on "Create Event".
- Confirm the event creation via the pop-up.
- Switch to the event overview on doo. Here you can edit the event you just created.
Important! The department(s) must be informed in advance when the Children Campaign will be closed - please state a binding date - as no changes are possible after that!


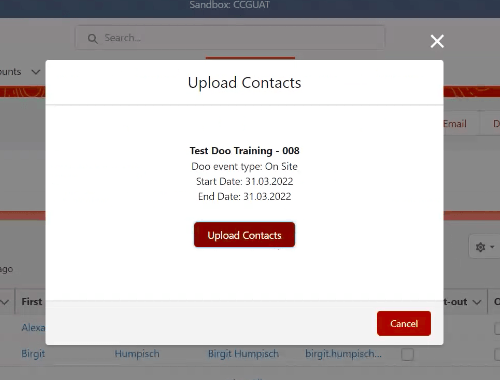
Contact Upload
In Salesforce you can now upload the contacts assigned to a campaign to doo.
To do this, you must reopen your created child campaign and change the campaign status from "Planned" to "Completed".
- Then click on the "Upload Contacts" button.
- You can now find the uploaded contacts in the contact overview in doo. The contacts are automatically assigned to a contact group. This bears the same name as your campaign.


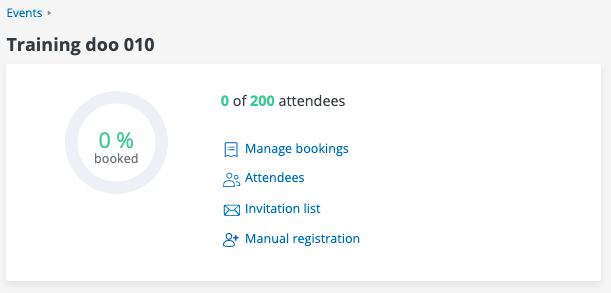
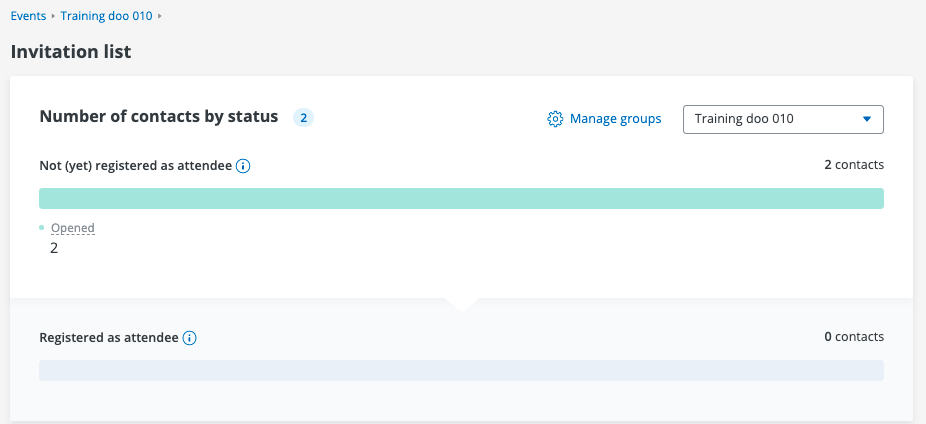
- Now open your event in doo and click on the "Invitation List" button.
- Add the contact group you just created to your event here.
Important! Subsequent contact upload via Salesforce is not possible. Please make sure that all contacts are assigned to the campaign in Salesforce before contact upload.
Edit Event
After logging in to doo, you can find the created event in the left navigation menu under the menu item "Events".
You can edit the following data when processing the event:
event options
- Name of the event
- Short description
- Date and time
- Logo and title picture
- Contact details of organizer
- Event location
- Event description
- Own event fields
ticket options
- Total Capacity
- Ticket Categories
- Ticket Categories - Advanced Settings
Participants & Bookers
- Booking data
- Contact person
- More booking details
- Products
- Advanced settings
Edit Event
To edit an event, click on "Edit event"; further adjustments to the event can be made there.
All other data, such as name of the event, date and time, contact details of the organiser, venue and event description, can be added there as you wish.
Event information can be edited on the first page, ticket information on the second page, and booking and attendee options on the final page.

Name of Event
The name of the event is taken from the event creation in Salesforce and is visible on the website, the tickets, the booking emails and in the email campaigns.
Brief Description
The brief description appears on the website under the heading "Event information". This can contain up to 250 characters. The brief description should be short and sweet.

Date and Time
The date is taken from your child campaign in Salesforce. Please specify the start and end times of the event for the time.

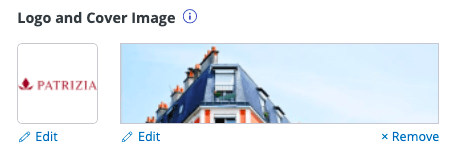
Logo and Cover Image
Under "Logo and Cover Image" you have the option of changing them using the "edit" button.
It is possible to upload your own cover photo or logo.
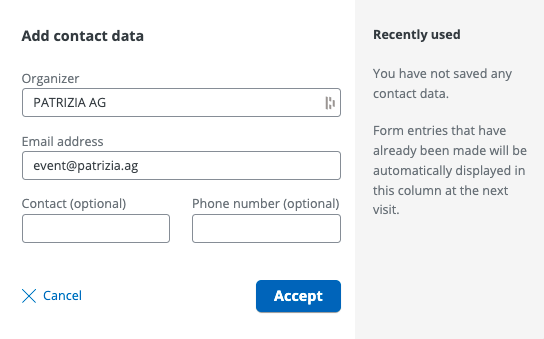
Organizer Contat Data
Depending on the template, the contact details are already pre-filled accordingly.
Please check the information before the event release.
Organizer: Organizing company/department or similar.
Contact person: organizational person in charge
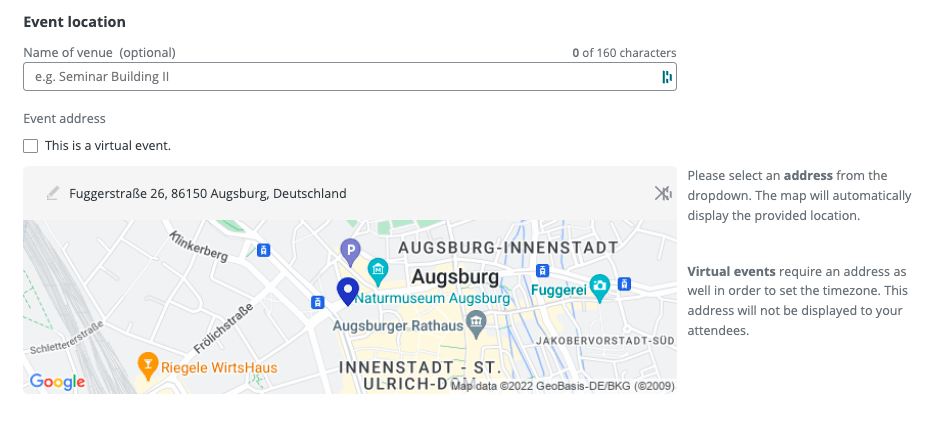
Event Location
In the first field "Name of venue" you can enter your own description and more details about the event location, such as the exact name of the room. The description is displayed on the website. You can enter the exact address in the "Event address" field. This appears on the ticket and the website and is used for the arrival of the participants.
Important! As soon as you start entering the address, you will be presented with address suggestions in the drop-down menu.
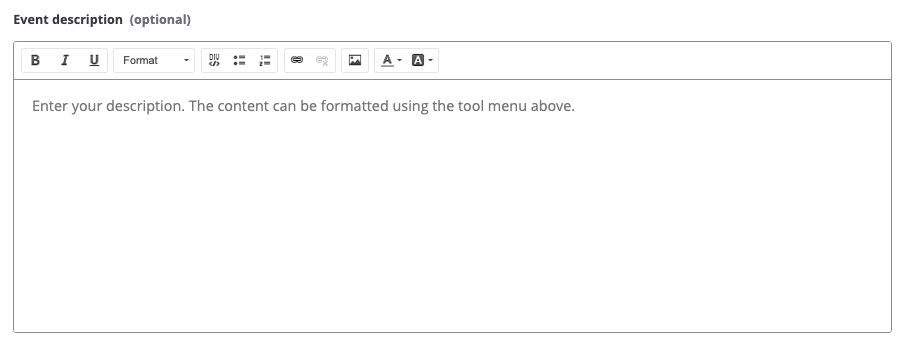
Event Description
Enter the event description here.

Total capacity and total number of tickets per booking
Here you can change the total capacity (= maximum number of participants) of the event.
The total capacity determines the amount of all ticket capacities and may not be larger or smaller than the highest ticket capacity of all selectable tickets.
By default, the total capacity is set to 200, but it is editable.
You can specify the minimum number of times the ticket must be booked.
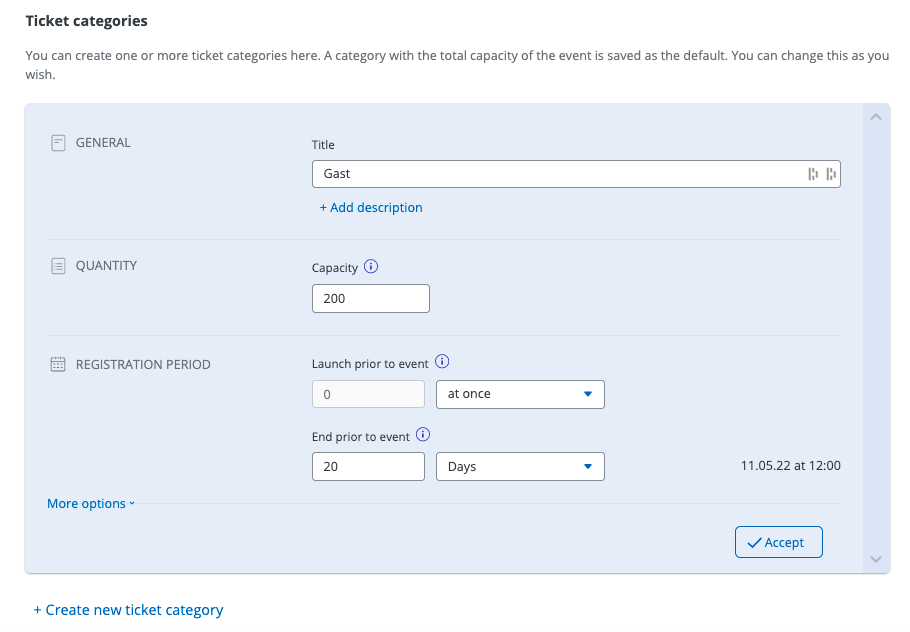
Ticket Categories
Under the "Ticket Categories" section, you can add new tickets or edit existing tickets. You can edit the title, description, and capacity.
You can use the quantity to specify how often the ticket can be purchased. Please always adjust the total capacity at the same time.
You can use the registration period to determine when the ticket should be available and until when it is possible to book the ticket.
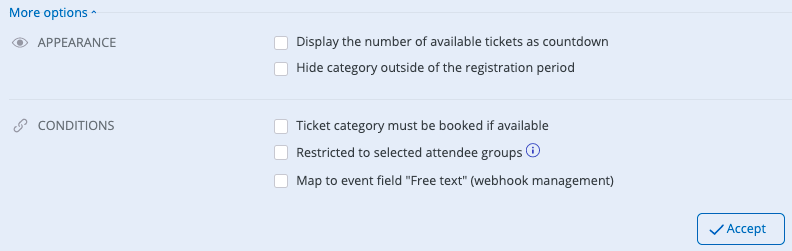
Ticket Categories - More Options
You can call up additional ticket settings via "More options". There you can specify whether the number of available tickets is displayed as a countdown to the left of the selectable number of tickets, how the tickets should be handled outside of the booking period, or whether the ticket is already preselected. You can also specify the booking conditions here, i.e. you can specify whether the ticket must be booked if it is available, or whether only individual groups of participants can book the ticket.
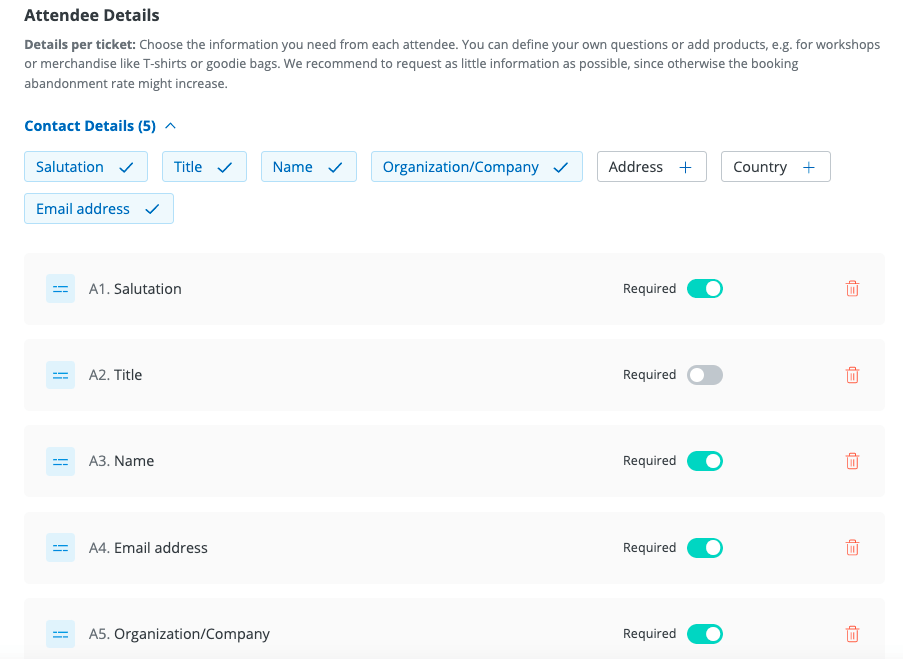
Attendee Details
By clicking on "Save & continue" again, you are in the last creation step, the attendee data. Here you can choose which questions to ask the attendee. You can define these as mandatory or optional. You can also offer additional products (see below).
Contact person
By clicking on the checkboxes in the upper part you can change the selection of the questions. The order of the specified data queries cannot be changed.
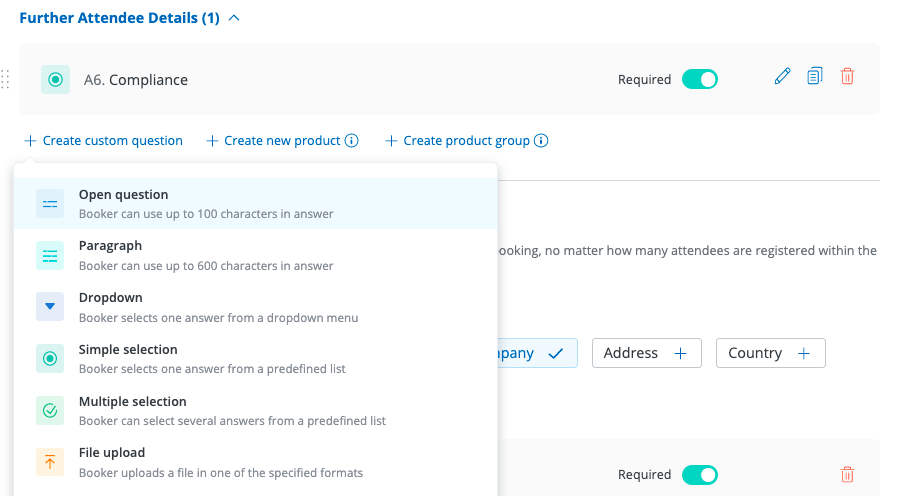
Further Attendee Details
You can also create your own queries via " Create your own question". All fields can be freely edited here.
If you have already created your own contact data field via the organization settings, you can link the query to this. Name, description and whether the answer is mandatory are visible on the website.
Available data fields:
- Open question: Offers space for up to 130 characters
- Paragraph: Offers space for more than 130 characters
- Dropdown: Offers a selection option from an individual drop-down menu
- Single selection: Only one answer can be selected from several possible answers
- Multiple selection: All of them can be selected from several possible answers
- File upload: The booker must upload a file (available formats: .pdf; .png; .jpg)
- Phone number: Specially suited for phone numbers
- Date: Specifies a date
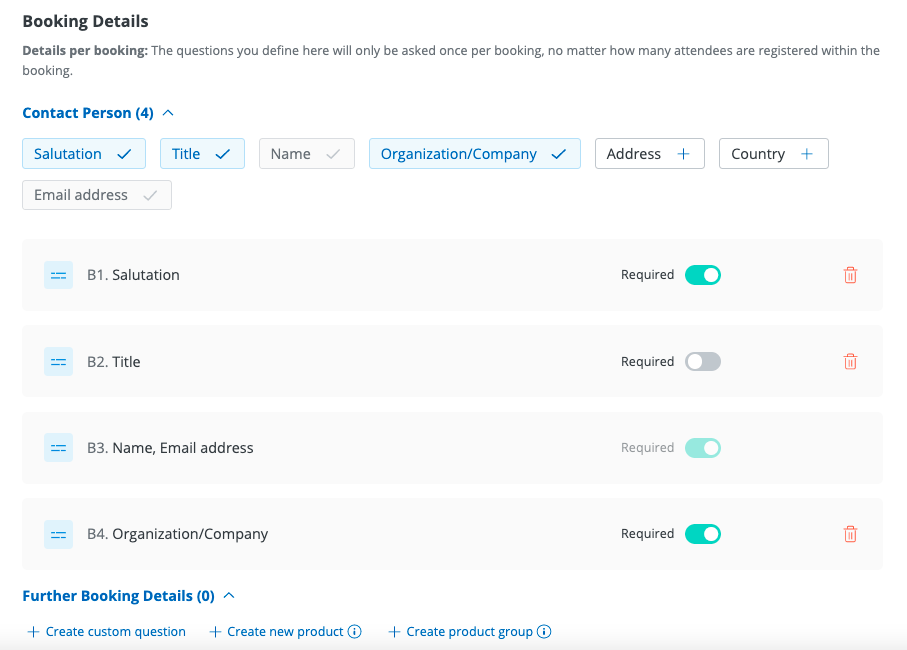
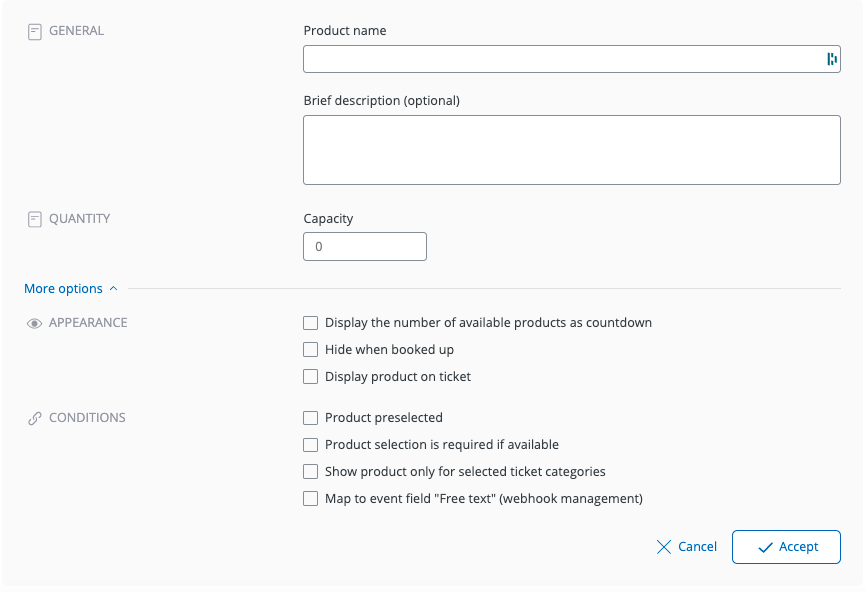
Products
Below the individual booking questions is the " Create new product" button. Additional products can be offered here.
In the Product name field, you can specify the name to appear.
Enter the brief description in the field below. The quantity can be set via the "Capacity" field. In the more options, you can specify the product presentation and the booking conditions, analogous to the ticket settings. Click on "Accept" to save them.

Advanced settings
In principle, these fields only need to be edited in special cases.
Here you can specify whether pre-filled data, for example from invitation emails, can be edited by the participant and whether a new contact should be created in the event of a change. You can also set whether participants can leave comments to improve the booking process.
The fourth setting concerns event communication. If the option is activated, the participant will see a notification window. This will draw the attention of the customer to the fact that the event-related communication has been approved.
The following setting is dedicated to the newsletter. If you activate this option, the booker will receive an e-mail to the specified e-mail address and must confirm receipt of marketing-oriented e-mails.
In the last two settings below you can specify which design you use for the booking process and whether the participant data should be queried first and then the booking data or vice versa.
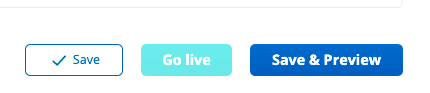
Go Live
By clicking on "Save" all information is saved, you remain on the current page and the event is still in "draft" mode.
By clicking on "Save & Preview" all details will be saved and you will be taken to a preview of the booking process. The event is still in "darft" mode.
Clicking “Go live” will make the event go live and attendees can register.
Important: Once the event has gone live, ticket categories can no longer be deleted.
Important: Once an event has gone live, this cannot be undone!
Settings
Clicking on "Settings" takes you to the settings for the respective event.
In the settings you have the possibility to adjust e-mail content, booking conditions, cancellation & booking approval, languages, tickets & attachments as well as access codes.
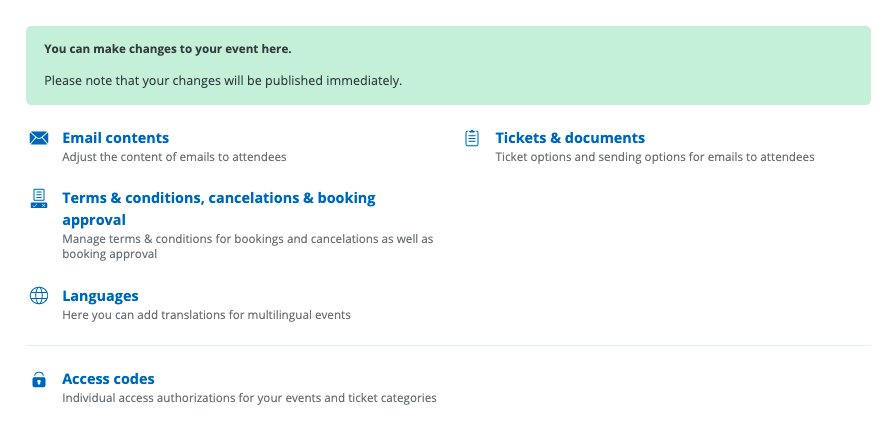
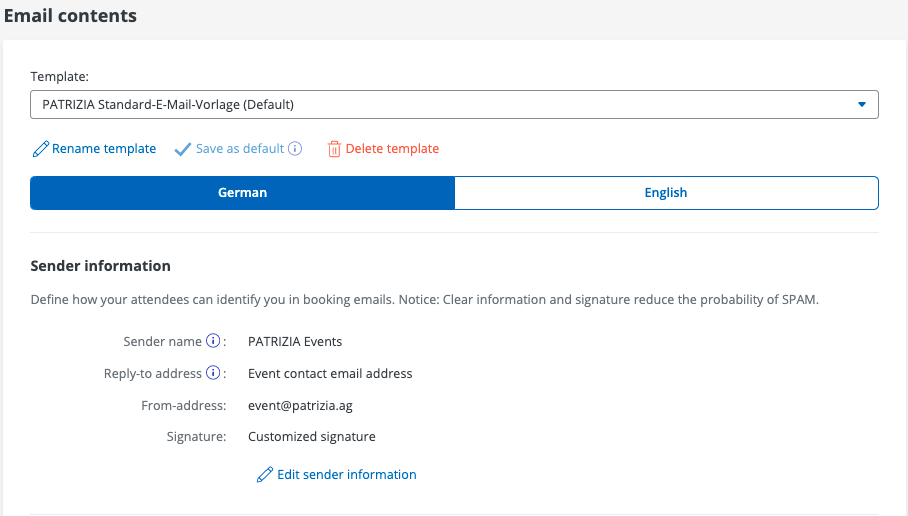
Email Contents
Under Email contents you can adjust sender information as well as the texts for the automatic booking confirmation and cancellation confirmation. Various templates are available for this.
- Select the desired template. The sender name is displayed to the recipient in their e-mail program (= Outlook name) and can be freely selected (default: PATRIZIA Events). Select a sender address (= mailbox/e-mail address) out of.
Important! The email address event@patrizia.ag, as well as the signatures and texts are stored by default.
Finally, you can edit the texts for the automatic booking and cancellation confirmation as well as the event reminder.
To do this, click on “Edit email content”. Standard texts are already stored here for the emails.
In addition to the links to the booking portal, you can use an automatically generated calendar entry or send booking details. You can send a sample email to any email address send tests. (Click on "Send sample email")
Important! Please make sure to edit die German and the English version of your system emails, if you have a bilingual event.
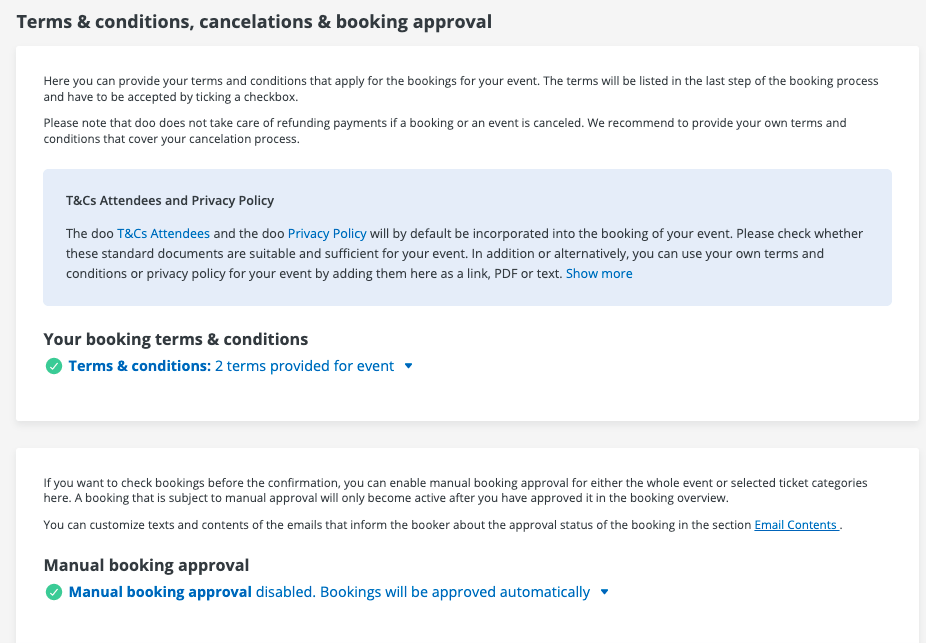
Booking Conditions, Cancellation & Booking Approval
Under "Booking Conditions, Cancellation & Booking Approval" you can store your own conditions and make further settings for bookings and cancellations.
"Your booking conditions": Are preset and changeable.
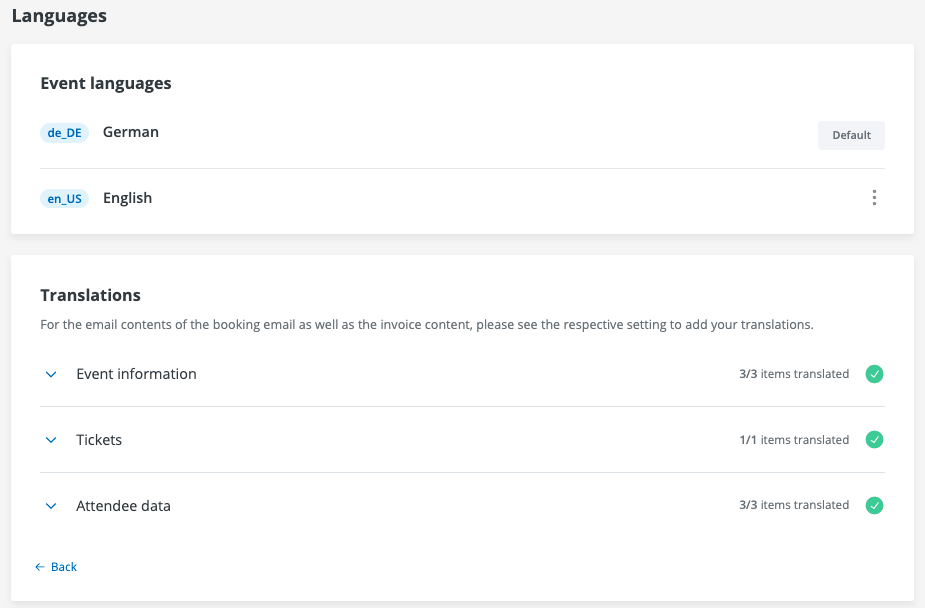
Languages
Under Languages you can translate the texts for event information, tickets, participant data and booking conditions into English. The default language of the event can also be changed to English here. In the left column you will first see the higher-level items, if you expand them, the elements to be translated appear. The translation can be entered in the appropriate field on the right-hand side. By default, some translations are already stored.
Important! You can only store two languages.
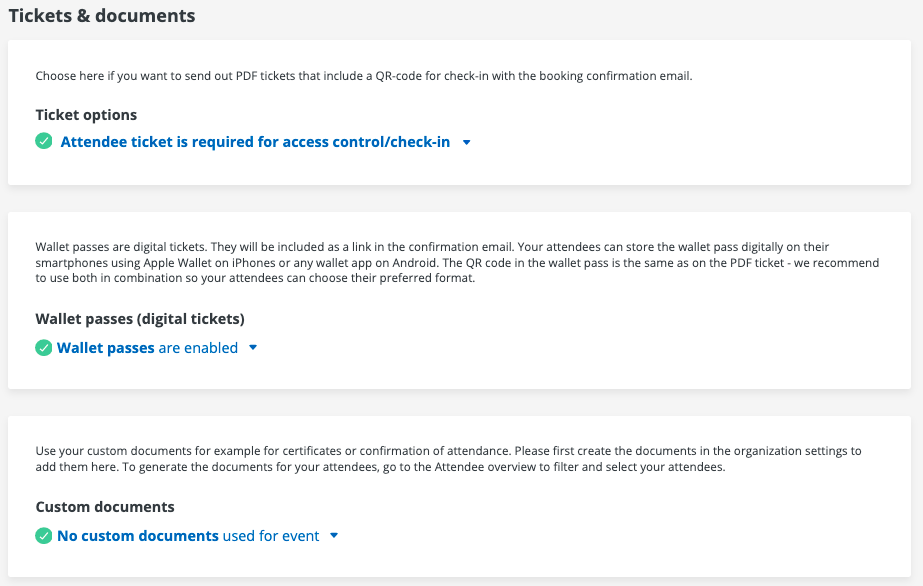
Tickets & Documents
In the settings for "Tickets & documents" you can choose under ticket options whether a PDF ticket with QR code for check-in should be sent with the booking confirmation email and an email attachment with the booking emails.
You can also add more under “E-mail attachment for participants” (the system says participants).
Add email attachments to the (automatic) booking confirmation email.
Access Codes
Access codes are required to register participants (e.g. to send the invitations by post), which are printed on the invitation.
If an access code is stored for an event, all or individual ticket categories only become visible after the code has been entered on the event website.
You can also email codes. Use the special link "Login" or the personalization "Code" in your campaign message. (! If you use this option, it is necessary to adjust the e-mail messages in the fields below !)
Properties of access codes:
- All access codes are event-specific and always apply to the event for which they are created. If you want to control the number of tickets that can be booked with an access code, you can define a maximum number of tickets per booking in the event processing in the ticket category settings.
Creation of access codes
To set up access codes, please proceed as follows:
- Go to the settings of the event for which you want to create an access code. Click on "Access codes" on the bottom left. Go to "Create new access code". The following dialog opens (example):
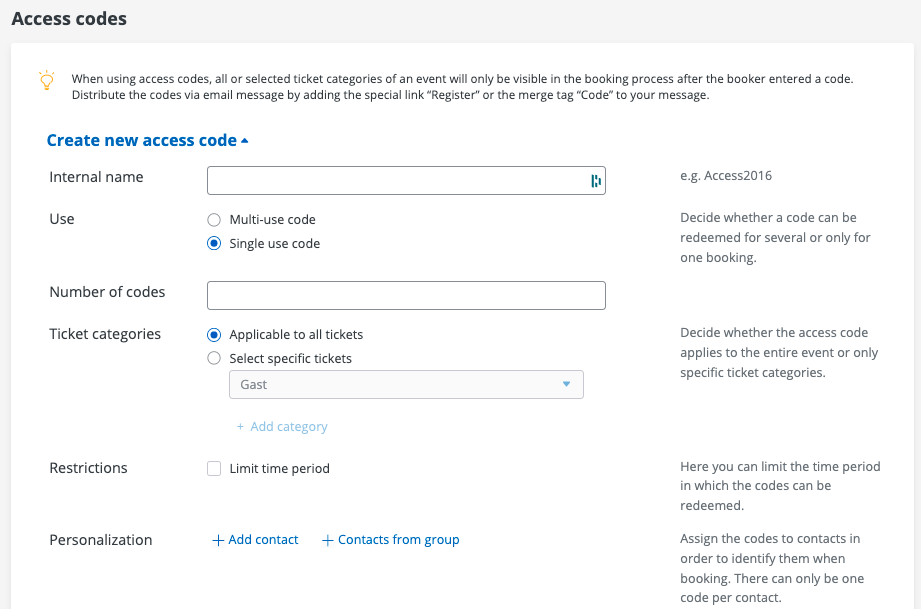
- Internal name: Name the access code list, e.g. B. "Code-List-01/22".
- Use: Choose between a code that is only valid for a single booking or an access code that can be used multiple times.
- We recommend multiple codes, for example for events or individual ticket categories for a specific group (e.g. members).
- We recommend one-time event codes for personalized ticket access that you want to send to selected people for your event, e.g. via a doo campaign email message.
- Number of codes: Insert the number of access codes that are to be created (up to 5,000 per list).
- Ticket categories: Select whether only certain or all ticket categories should be visible by entering access codes.
- Restrict period: If desired, restrict the validity period of the access codes. The encrypted ticket categories can only be activated within the specified time period and are not available outside of this period.
- Personalize and prefill one-time access codes: You can use this function to assign an access code to specific contacts. To personalize an access code list, click in the overview on the pencil symbol of the corresponding code list. Here you now have the option of assigning the access codes to individual contacts or a contact group. If you then download the code list, you can see which code has been assigned to which contact and distribute it accordingly. "
- Add contact" generates a field in which you can add your contacts by entering a name or e-mail. You can search through an address and then assign one of the codes to it.
- You can use "Contacts from group" to assign the codes to a group from the contact center.
Note! The access codes can only be linked to existing contacts. New contacts cannot receive personalized access codes or be entered.
- If you then check the "Prefill with contact details" box, you can choose whether the data should be prefilled for the participant questions, the booking questions or both.
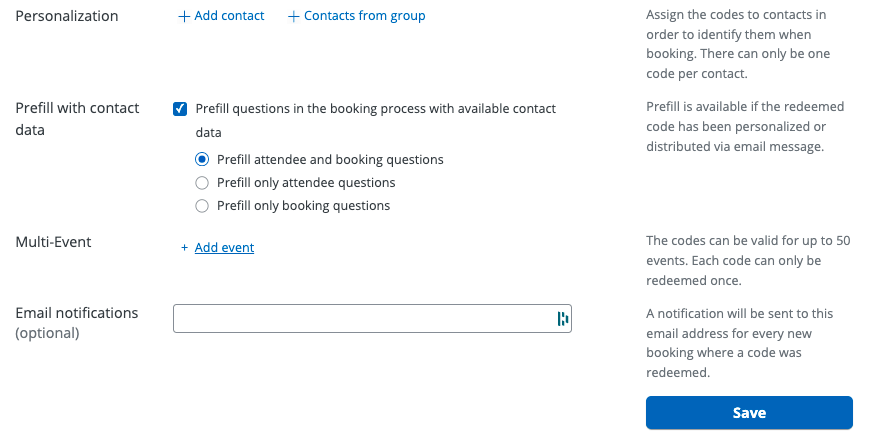
- E-mail notifications: Optionally enter an e-mail address here to receive a notification each time the access code is redeemed. Save your settings with "Save".
You can edit, start/stop or delete your access codes here.
An access code is inactive if it cannot currently be redeemed due to a limited validity period. To enable it, adjust the settings under Limit time period.
Codes that have already been redeemed can no longer be deleted. However, it is possible to disable them. Deactivated codes can no longer be redeemed and are marked as "Stopped" in the overview.
After you have saved the information in the code list, it appears in the overview.
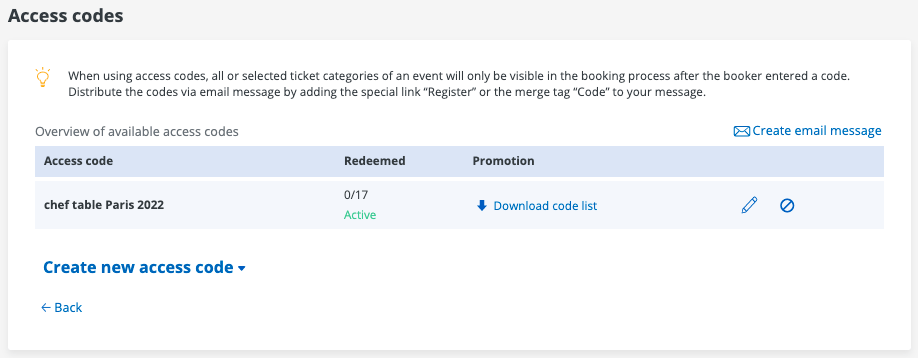
To find out which codes were redeemed, how often, by whom and for which booking, you can download the corresponding code list at any time via the event settings. Any promotion and access codes used are also listed in the Excel booking overview, which you can download from the event details page.
Booking Overview
In the booking overview, each individual booking of all account-related events is collected centrally.
You can use the "Booking overview" menu item to manage the bookings, regardless of whether they are about sending tickets or booking confirmations.
Therefore, you get an overview of the various built-in filter functions.

The most important steps:
- What should I do if I'm looking for a booking?How does the advanced search work?How can I adjust existing booking details?How do I download tickets?How do I resend the booking email?
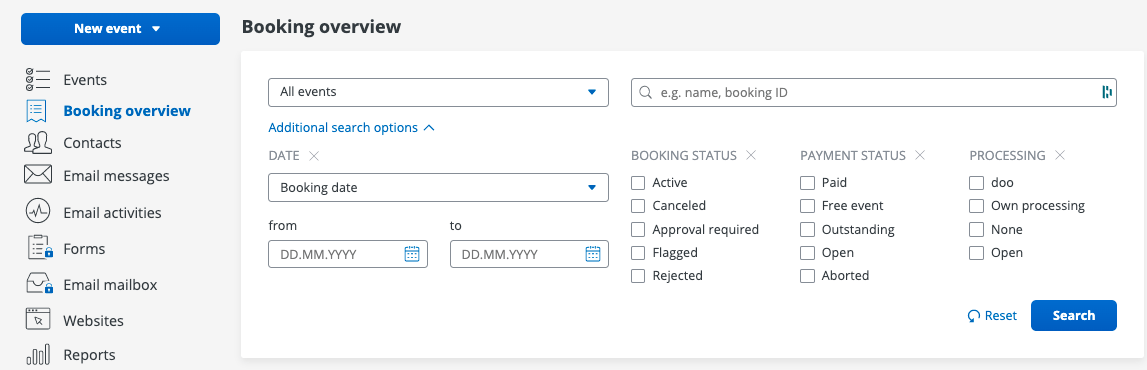
Search in the Booking Overview
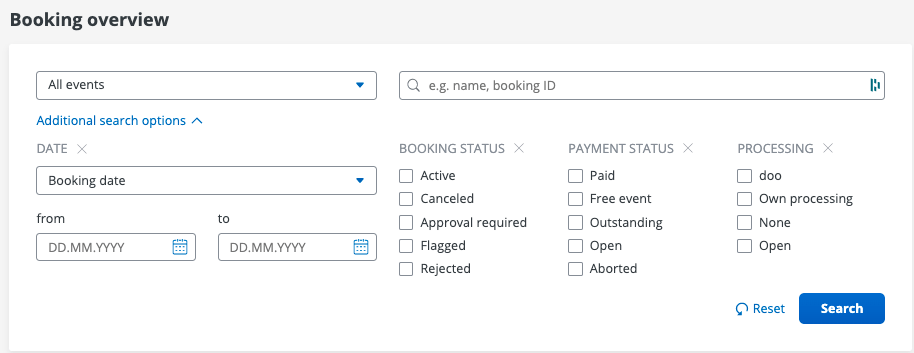
- Select the respective event from the drop-down menu. In the search field to the right, enter known booking details, such as name, booking number or e-mail address. Confirm the search request with the "Search" button.
You can delete the search parameters using the "Reset" button.
A notice! The drop-down menu consists of the date of the event, the event name and the event ID. The event ID is unique and is also displayed in the event overview.

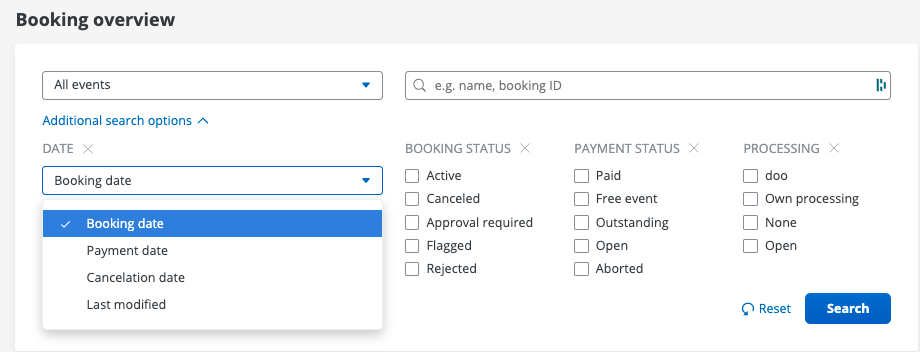
Extended search in the booking overview
If your previous search was unsuccessful, or you are missing the booking details, you can narrow down the bookings using the extended search and filter function.
- Only enter data in the fields that you can confirm. If you are unsure, leave the fields blank.Click on "further search options" to make all filter options visible.In the third field you can choose between booking, payment and cancellation dates and at the same time narrow down the period.You can also by Filter by booking status, i.e. between active and canceled bookings. A booking is active as soon as it has been released. You can also filter according to the current payment status. In the sixth field, select the type of payment processing. This can take place through us or you. With "Search" you confirm the search settings you have made.
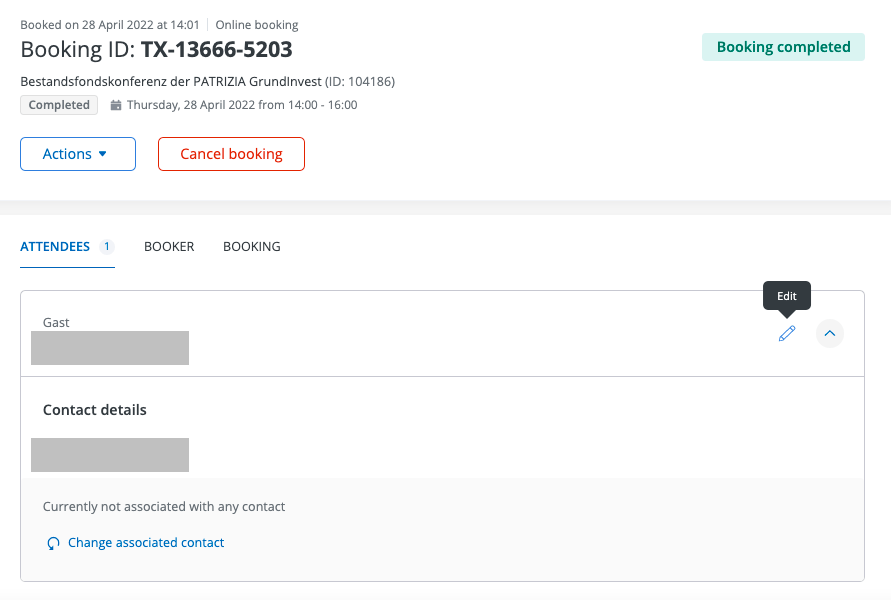
Edit Booker Data
- Select the relevant booking by clicking on it.Click on the pen to edit the data.Edit the booking data and confirm the changes by clicking on "Save data"
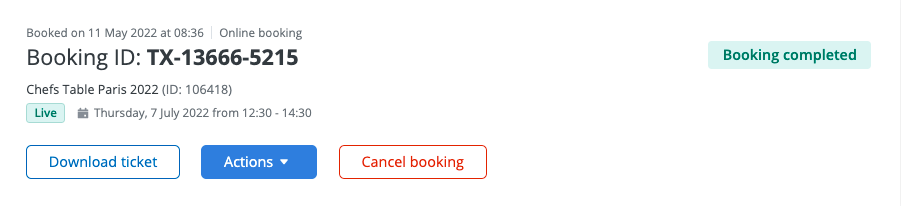
Download tickets
- Select the appropriate booking.Click on "Download ticket".
Important! If a booker has booked several participant tickets, these will be provided in a .zip file. The tickets are saved in PDF format.
Resend Booking Confirmation
- Select the relevant booking by clicking on it. Click on the "Actions" button. Select "Resend Booking confirmation email".

Contact
The most important steps:
- Overview of contact data fields
- Manage contacts
- Import contacts
- Groups Contact search
- Visitor search
- Data management / automatic deletion
- Export participant list
Overview
In the menu tab "Contacts" you will find all information regarding your contacts.
Contact Data Fields
In order to get all relevant event information, individual data must be queried for each event. For this purpose, new data fields can be created when uploading/importing contacts, in event creation and in the organization settings. The gear icon in the blue bar at the top takes you to the organization settings and you will find there under the "Data" tab and the sub-item " Contact data fields” the setting options.
Contact upload
In Salesforce, you can upload the contacts associated with a campaign to doo.
To do this, click on the "Upload Contacts" button. You can now find the uploaded contacts in the contact overview in doo. You are automatically assigned to a contact group. This contact group has the same name as your campaign. Now open your event in doo and click on the "Invitation List" button. Add the contact group you just created to your event here.
Important! Subsequent contact upload via Salesforce is not possible. Please make sure that all contacts are assigned to the campaign in Salesforce before contact upload.

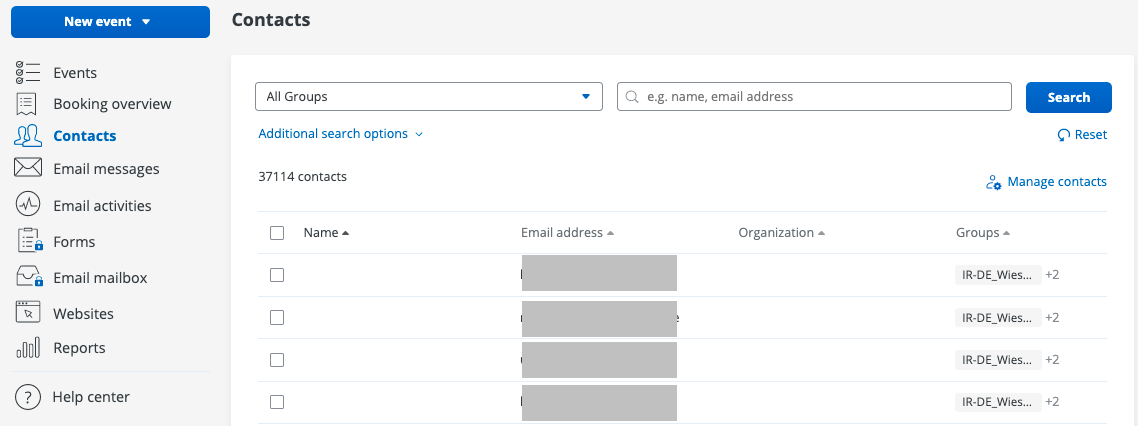
Contact Search
If you want to edit a contact, you can find it using the integrated search and filter function. Simply enter known contact details in the search field and confirm the entry by clicking on "Search". To refine the search, you can add additional search criteria via "Additional search functions".
Important! Make sure you are in the correct group.

Visitor search (visitors = participants who have agreed to attend the event)
If you want to edit a visitor, you can find them using the integrated search and filter function in the booking overview. Simply enter known data (e-mail address, booking number, name,...) in the search field and confirm the entry by clicking on "Search". To refine the search, you can add additional search criteria via "More search options".
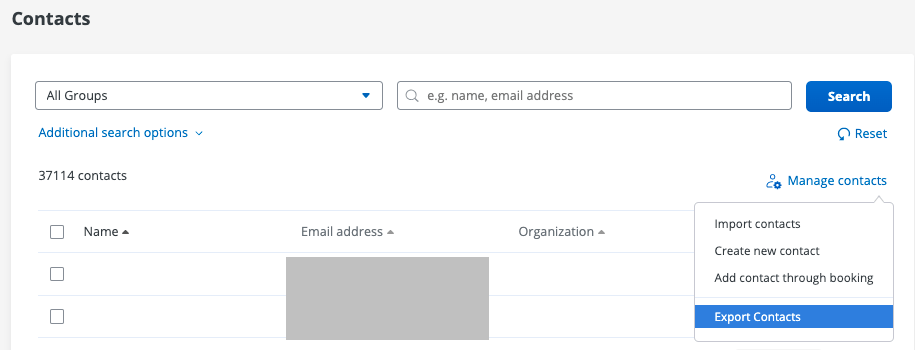
Export Contacts
Important! This section describes the export of the contact list, this is not an export of the participant list.
To export contacts from the system, you must select the "Contacts" menu cell in the menu structure. Then click on "Manage contacts" and select "Export contacts". You can then specify the file name and choose between UTF-8 or ISO 8859-1 (Latin-1) file encodings. We recommend UTF-8 encoding.
Tip! You can also export individual groups and use the built-in filter. During the export, all data fields and contact information, such as group memberships or newsletter subscriptions are exported
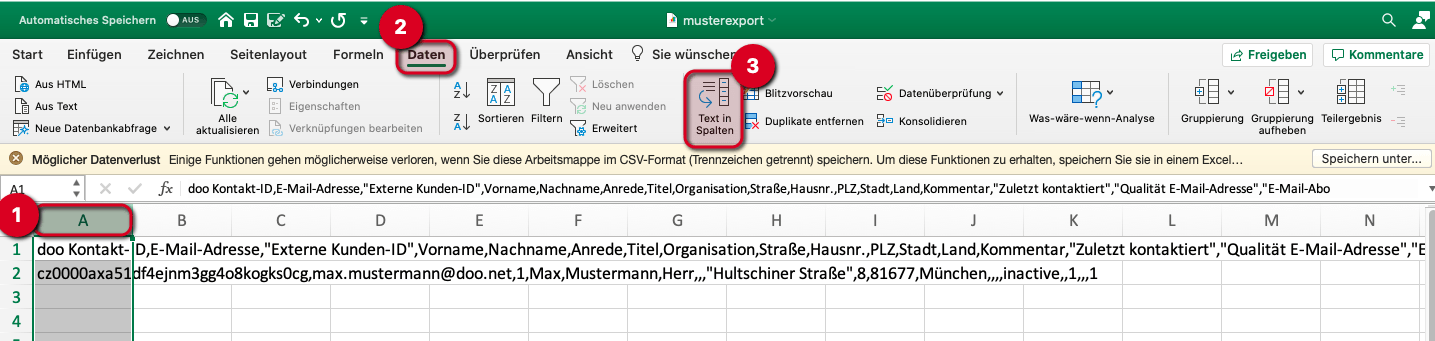
The file can be further processed with all common spreadsheet programs. To turn the .csv file into a regular spreadsheet file, open it in Excel. The dates are now all displayed in the first column and are separated by a comma.

To separate the data, select the first column. Then click on "Data" and select "Text to Columns".
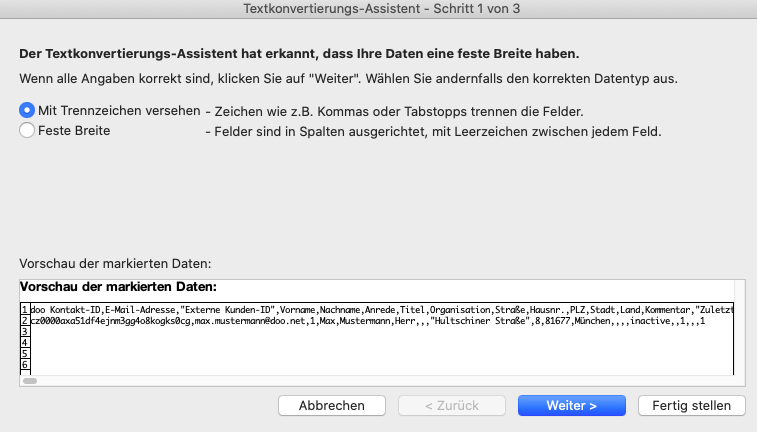
Follow the text conversion wizard. In the first step, select "delimited". Confirm this by clicking on "Next".
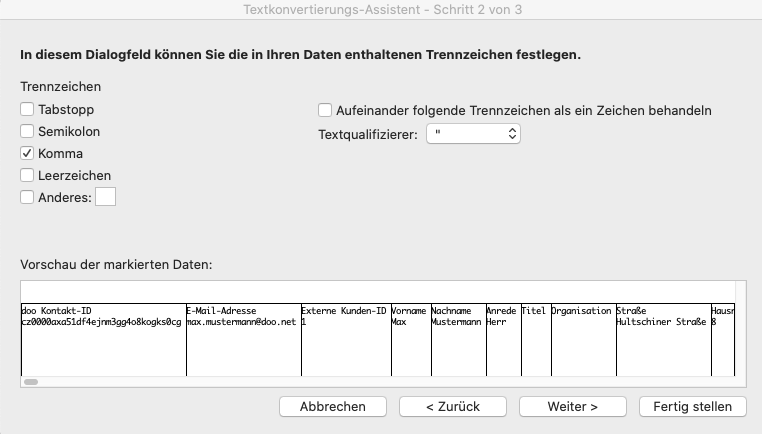
In the second step, select "Comma" in the selection list of separators. Make sure that only this one value is selected and go to the next step.
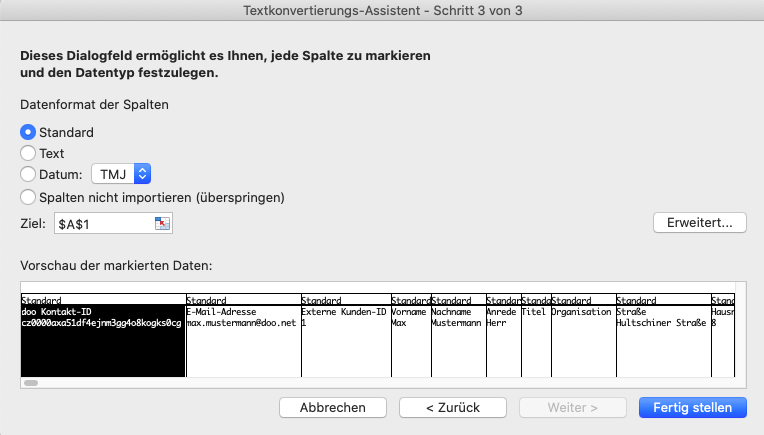
In the last step you can specify the data format for each column, alternatively you can leave the format with the default data type. Close the assistant by clicking on "Finish". The data can then be saved in the .xlsx file format using the "Save as" dialog box.
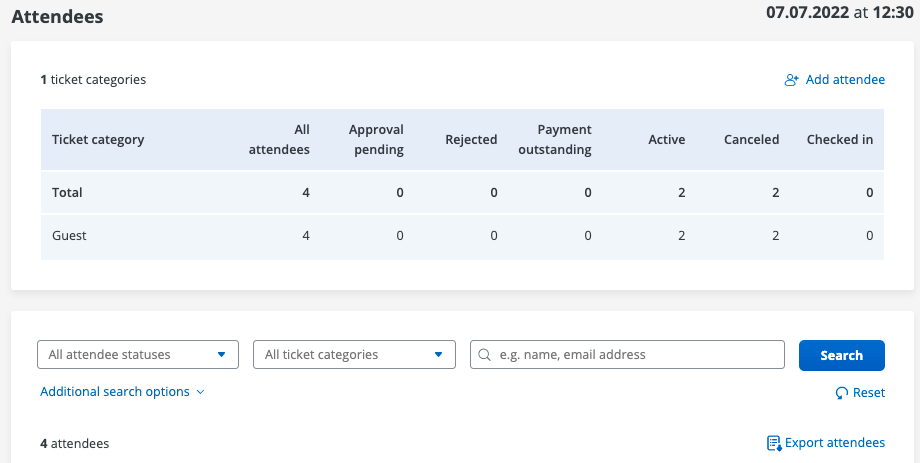
Export Booking List
To download a list of all confirmed participants, please follow the steps below:
- Select "Participants" in the event overview. Click on "Export participants" to download a list of all participants and their current status.
The list can be downloaded as an Excel or CSV file.