

YOUR doo EMAIL CAMPAIGN
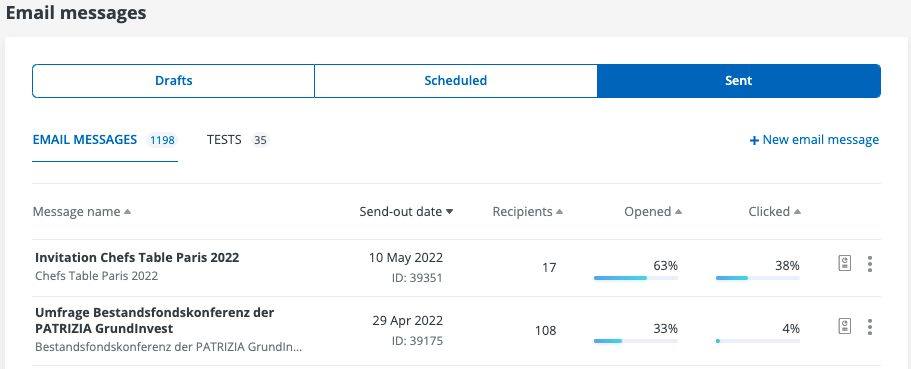
Email messages (campaigns/manually sent emails)
Welcome to the training page. Below you will find an overview of all functions and how to use the system.
The most important steps:
- How do I create a new e-mail campaign?
- How do I send test messages?
- How do I use campaign design templates?
- What do I have to consider when sending reminder e-mails?
- Where can I see the e-mail reporting?
- What What can I do if my e-mail invitation ends up in the recipient's spam filter?
- What do I have to do to resend my e-mail?
- Where can I find the campaign evaluation?
Email Campaigns
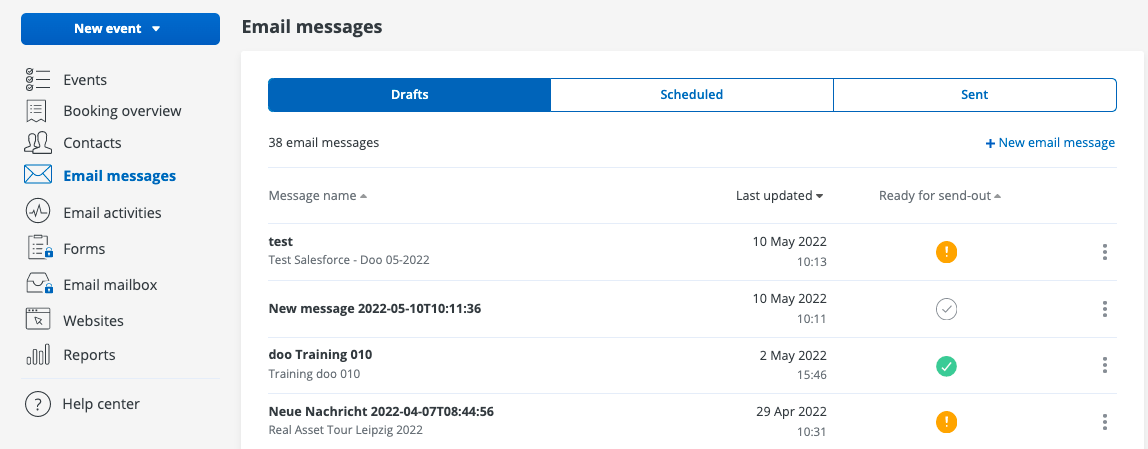
From the menu, click Email Messages.
You see an overview of the draft, planned and already sent email messages.
Create new campaign/email template
You can start a new email campaign via " New email message".
Important! If you copy a message, you cannot choose between the stored templates, you can only change the stored template!
If you are creating a new message, fill in the required information in each section.

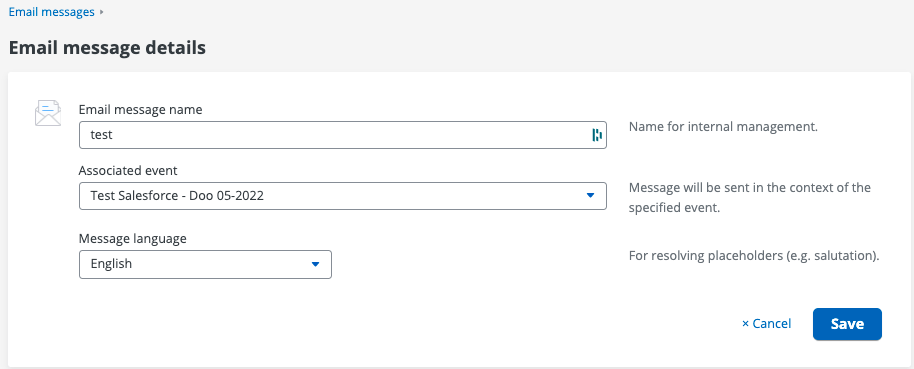
Email Message Details
- Enter a name for the internal administration of the message. Assign an event to the message. (Only the currently selected event is available for selection.) Select the message language. Click on "Save"
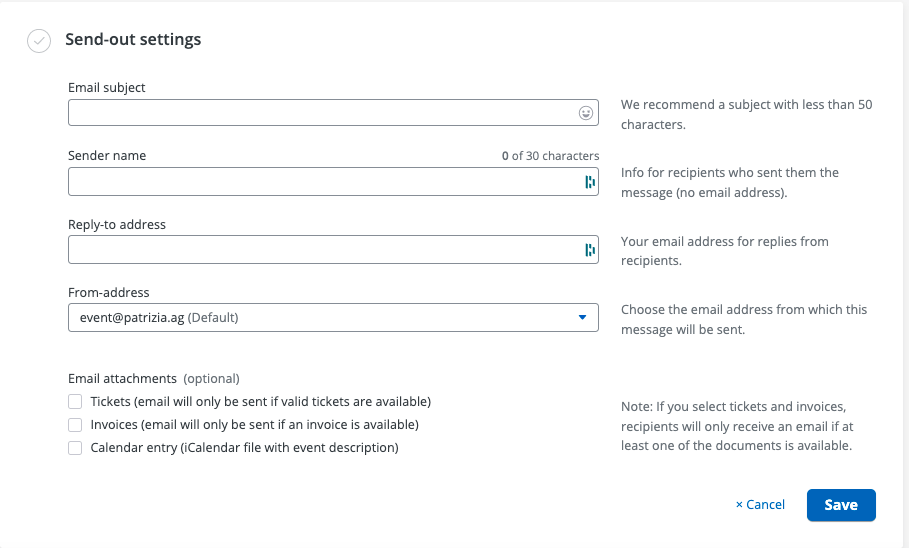
Send-out Settings
- Click on "Add info" to edit Enter an e-mail subject (e.g. invitation to event XY). Enter a sender name, this will be displayed in Outlook. Enter the desired reply address. Sender address: Choose one of the stored sender addresses.
Email attachments:
- You can optionally add e-mail attachments to the mailing.These are added systemically and cannot be edited.Other project-related and editable attachments can only be added to the confirmation e-mail (event settings > tickets & attachments).A link to further information in an invitation mailing is via Link to the event website possible. Click on "Save"
Recipients
- Click on "Add recipient" to edit
- Select the recipient group with the name of your event.
- Click on "Save"

Design & Content
"Select template" takes you to the templates (accordingly adapted to the event skin) and you can select the stored template. After the selection, you are directly given the opportunity to edit it and click on "Save & close" to return to the Overview.
More on this under Campaign Design "Campaign Design Templates".

Sending test messages
It is possible to send email messages to test delivery settings, design, content and links while the message is still in draft.
Test sending is only possible for e-mail messages if the following conditions are met:
- The e-mail message is in the "Drafts" tab. The general settings and delivery settings are fully configured. A design has been saved for the message Read permissions") At least one contact has been created in the contact center to whom the test message is to be sent
To send a test mail, proceed as follows:
- In the message details, click on the button to send test messages. Now you can select up to 20 contacts from the doo contact center to whom the test message should be sent. Confirm the test message. The system confirms the sending of the test messages
Restrictions on sending test messages
- No sending to blocked contacts. No sending if the e-mail code is incorrect (e.g. if there is an error in the liquid code or custom HTML/CSS).
The test messages include the following functionalities/special features
- Invitation links: Behavior as with "normal" sending, provided the event is live and the link leads to the standard event website or a page on which the event is integrated via widget.
- Promotion/access code: are not functional Google calendar link,
- ICS file and event fields: Behavior as with a "normal" dispatch
- Unsubscribe link: Behavior as with "normal" dispatch (if a contact unsubscribes via this link, he is considered blocked and will not receive any further (test) e-mail messages )
- Attachments (ticket, invoice): Test messages are generally sent without the documents attached.
Test messages do not appear:
- in the e-mail activitiesin the success report incl. export
- in the contact details of the recipient contact
- in the invitation list
You can display an overview and a report of your sent test messages by selecting the "Tests" tab in the view of your sent messages.

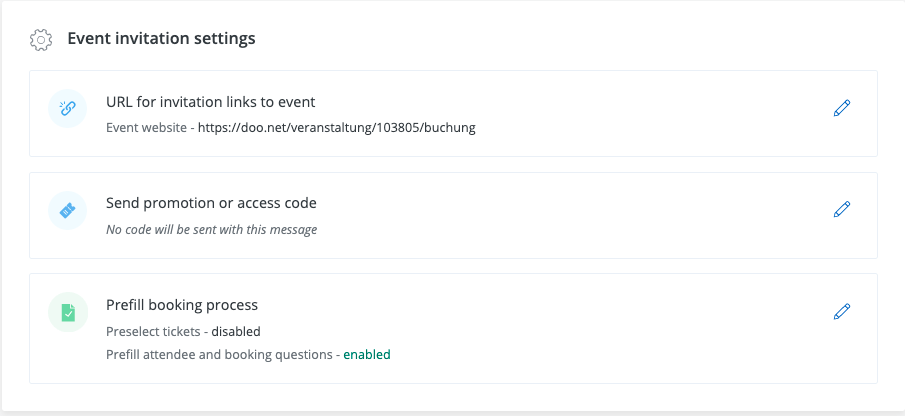
Event invitation settings
In the last step, you have the option of storing the various personalization options, such as the invitation link or the access code. If you want to send an invitation link that refers to the event website, enter this in the field.
If you have ticket categories that are only visible with an access code are stored in your event, you can send these access codes by email.
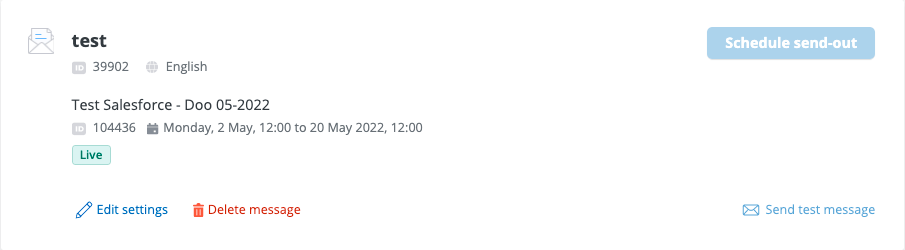
Now go back to the top of the page and you will see the button "Schedule send-out".
Click on it to schedule the send-out and set the desired time slot. The e-mail will then be sent automatically at this time.
Campaign Design Templates
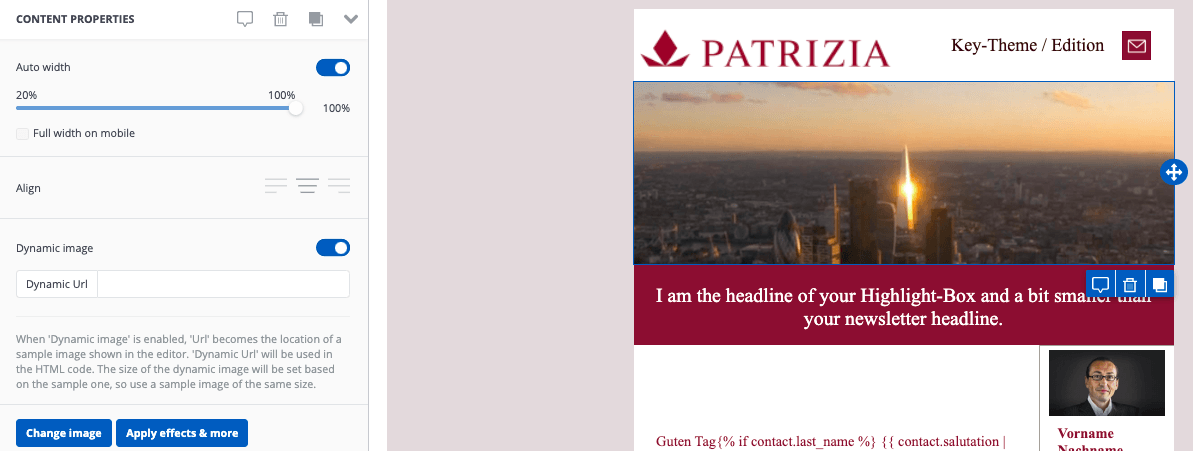
To customize the header of the email, select the image and click the "Change image" button on the right side of the content properties. The header should have a size of 5000x1250px.
Detailed Steps:
"Select the picture" > "Change picture" > "myfiles" > "Drag and drop the picture" > "Insert" > "Save & close".
The personal salutation and registration and rejection buttons are automatically taken from the template and no longer have to be adjusted.
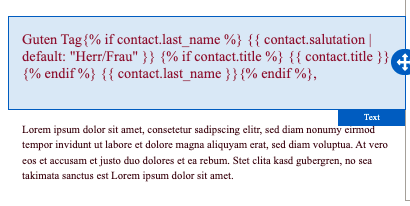
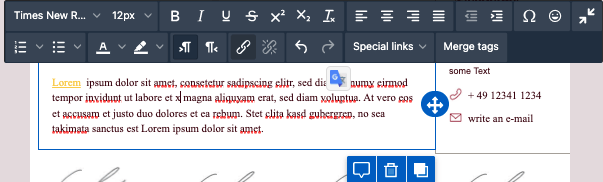
You can edit the texts in the editor.
If you want to adjust the color of the text, you must first select the relevant text with the mouse, then click on the down-pointing arrow in the black editing menu next to "Edit font color" and select the color palette icon here.
Now you can adjust the color here by adjusting the values for RGB or # on the right.
Please refer to your CI when choosing the color.

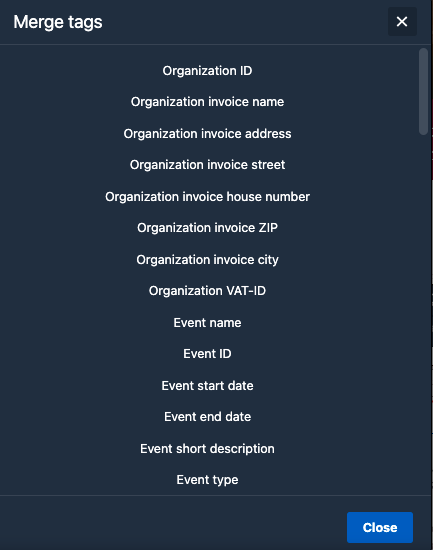
If you click in a text field you have the possibility to insert personalizations.
Under Merge tags you will also find "code", for example, which you need if you want to use a previously created access code by email. You can also send the access codes under "Special Link" -> "Registration".
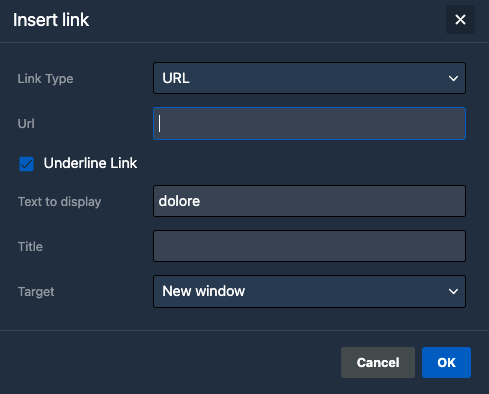
If you would like to include a link to the event page, select the appropriate word ("here"/"event website") and click on "Special links" > Invitation > Register or copy and paste the desired URL using the usual procedure.
Adjust the display color of the link by marking the linked word and entering the appropriate hex code under "Link color" on the left.
If you want to insert a file as a link, first mark the desired text with the mouse and click on the paperclip symbol in the black editing menu. In the new window, select "Link file" as the "Link type".
Next, select one of the available online storage locations, such as "Myfiles" and then click "Upload" at the top.
Now select the file, upload it and finally click on the "Insert" button next to your file.
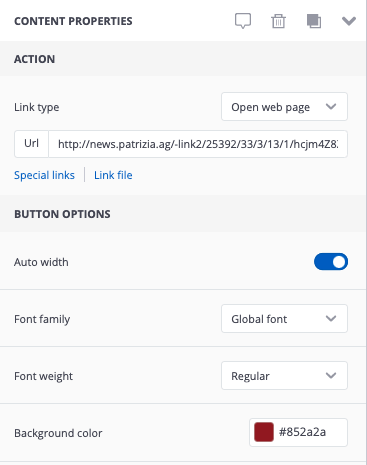
To edit an existing button in an email message, click on it and make the desired changes under "Content properties" on the left. Here you can change the background color of the button, the text color or the alignment of the button, among other things.
To insert a button click on "Content" in the left menu on the right side. Select the "Button" symbol there and drag and drop it to the desired position in the e-mail message.
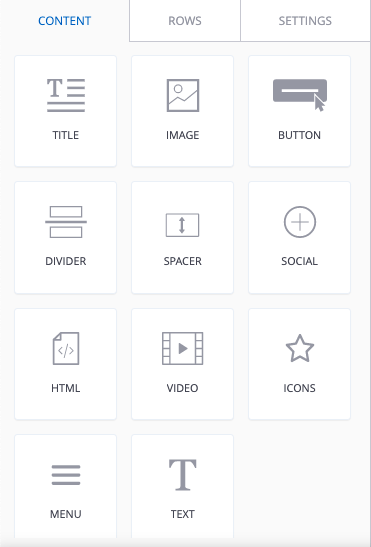
You can insert an image by selecting the "Image" tile in the left menu and then placing it at the desired position in the email message. To do this, drag and drop the tile into the message. Then click "Browse" >myfiles and upload or import an image.
You can use the “Preview” to preview the email and also choose between different end devices (desktop/mobile) at the top.
You leave the preview with the "X" in the top right corner.
You can save changes via "Save". "Save & close" takes you directly back to the "Email message details" overview.
Reminder email / reminder to contacts with missing feedback
In order for a reminder message to be sent to all contacts who have neither accepted nor declined, all registered contacts (accepted) and all contacts who have declined must be removed from the email distribution list.
Important! No automatic event reminder will be sent to participants, even if the corresponding field has been selected.
Remove the already registered contacts
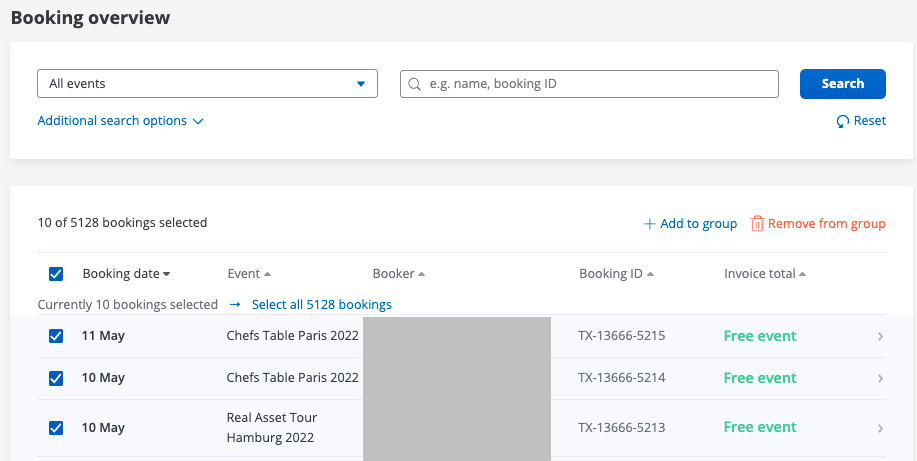
- Open all bookings via the "Booking overview" tab
- In the first column of the table, next to the "Name" column, select the checkbox to select all bookings on the first table page
- If there are more than 50 bookings in the system, click under the column names in the Green bar, which appears, "Select all xxx bookings"
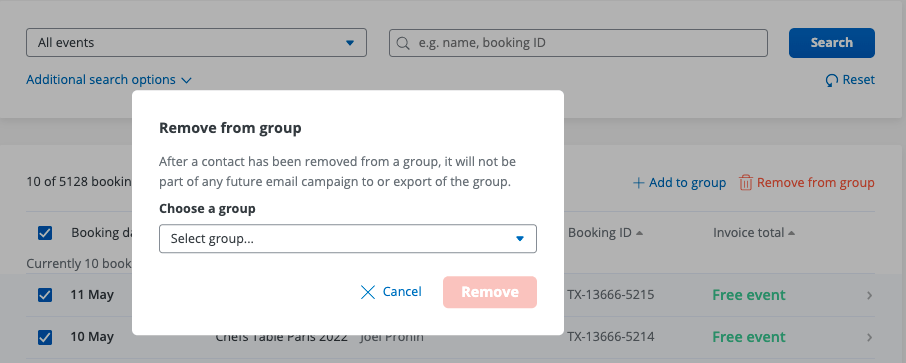
- Now select "Remove from group"
- A pop-up will open
- Select the respective recipient group in the pop-up
- Click on the "Remove" button
The registered contacts are removed from the recipient group.

Removal of rejections from recipient group
- Open your created event via the "Events"
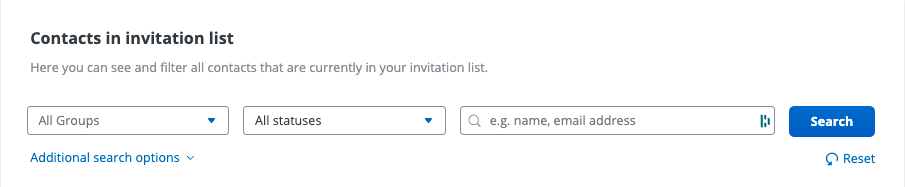
- Click on "Invitation list"
- In the lower table "Contacts in invitation list" select the option "Cancelled" in the "Status"
- Click on "Search"
- In the first column, select the In the table, next to the "Name" column, tick the checkbox to select all bookings on the first table page. If there are more than 50 cancellations in the system, click on "Select all xxx contacts" under the column names in the green bar that appears.
- Select now "Remove from group"
- A pop-up opens
- Select the respective recipient group in the pop-up
- Click on the "Remove" button
The rejections are removed from the recipient group.
If you wish to use the original email invitation, use the copy function.
Last but not least, add the edited recipient group to your reminder email/reminder.
Important! In the case of a copied e-mail message, the original recipient group is already stored.
Where can I see if everything went well?
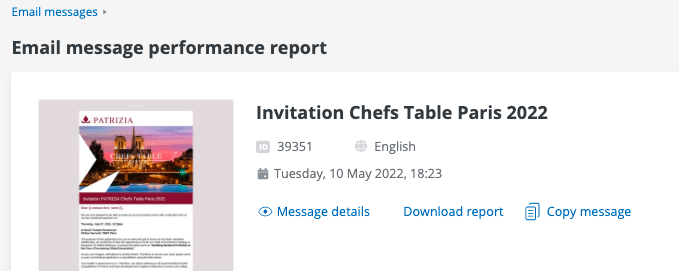
After sending, the status of your email will automatically change to the status "Sent". Select the "Sent" tab, here you will already receive initial information on the success report.
Click on the corresponding email message (campaign) and then on "View success report" (on the icon to the left of the three dots) to get more detailed information.
In the success report you will receive information on the following success parameters. You can also download the report as an Excel file using the "Download report" button.
Open rate (Provides information on how often the email was opened)
Click rate (Provides information on how many people opened a link in the email)
effective click rate (provides information on how many people who opened the email opened a link)
Loss statistics (Provides information on how many people have complained or unsubscribed)
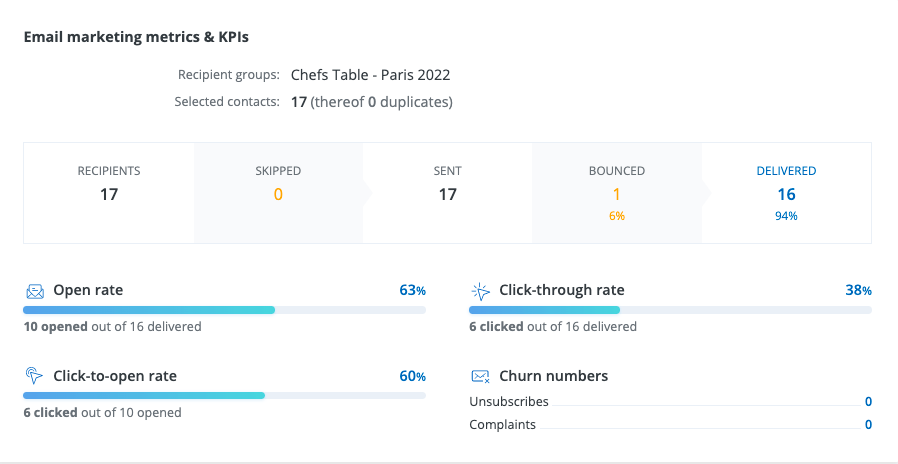
Bounces can be divided into three different categories:
1. Hard bounce: A hard bounce means that the e-mail address is generally not (or no longer) accessible. These contacts can no longer be written to via the doo email manager and will be automatically skipped in future messages.
- General: No specific reason for the hard bounce was reported.
- Address does not exist: The e-mail address does not exist (anymore), e.g. because the employee left the company or the address was entered incorrectly.
- Address blocked: The email address is already known as a hard bounce and is therefore no longer written to.
2. Soft bounce: The e-mail is temporarily unavailable and could not be delivered due to a problem or setting on the recipient side. But it is basically still available. You can try to contact the contact at a later time.
- General: No specific reason for the soft bounce was reported.
- Mailbox full: The recipient's mailbox is full, so he can't receive any more emails at the moment.
- Message too big: The message is too big and is therefore recipient's mail provider rejected. To avoid this problem, make sure that attachments and images are not too large.
- Content blocked: Certain contents of the message were blocked by the recipient's email provider.
- Attachment blocked: The attachment was blocked by the recipient's email provider recipient blocked for example because of the size or file type.
3. Unspecified: No bounce reason was specified.
What to do if my email invitation ends up in the spam filter of the recipient?
For free email addresses:
With free mail addresses such as Gmail, Hotmail, etc., it may happen that the invitation is not delivered to the inbox. In any case, ask your contact to save the respective sender address as a contact or mark it as a trustworthy sender.
For corporate email addresses:
With extremely restrictive e-mail policies in companies, it can happen that emails are only delivered to the recipient's mailbox if the sender or the IP address of the sender is white-listed centrally by IT.
You are welcome to point this out to your contacts, but recipients within these companies are usually also aware of the problem.


